
How To Create A Facebook Business Page – If you have a business, you need to have a Facebook Business Page to communicate with a large audience. With 1.82 billion daily active users, Facebook is not a social network you can ignore.
Moreover, that may be the reason more than 200 million businesses use Facebook’s free services. That consists of business Pages. Having a Facebook Page is a non-paid way to market your business.
The good thing is, creating a Facebook account for a business is very simple, and you may already have all the components you need to get started.
How To Create A Facebook Business Page
Before signing up for your Facebook Business Page, you will need to log into your personal Facebook account. The information from your personal account will be saved from being publicly visible on your business Page.
This is easy because every business Page is managed by one or more page administrators. These administrators are people with personal Facebook accounts. Your personal account is like the key to enabling you to use your new business Page. If you have team members assisting you with your Page, their personal accounts will as well unlock their specific roles and capabilities.
Therefore, if you are not already logged into your personal account, log in now, and let’s start the journey of Facebook page creation.
Step 1: Sign up
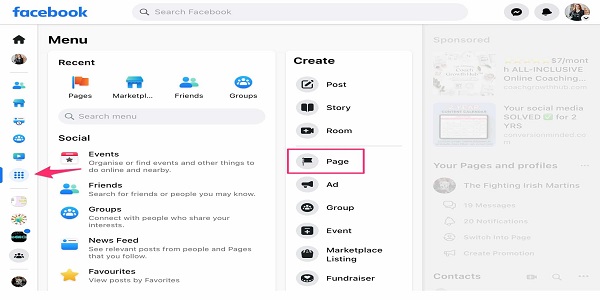
Go to facebook.com/pages/create.
Fill in your business information in the panel on the left. When you do that, the page preview will automatically update in real time on the right.
Source: Facebook
For your Facebook page name, use your business name or the name people will search for when trying to look for your business.
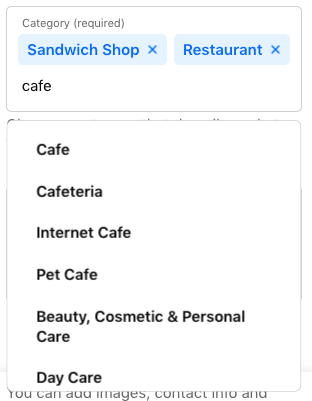
For category, type a word or two that states your business and Facebook will suggest some options. You can as well choose up to three of the suggestions.
Furthermore, fill in the Description field. This is the short description that shows in search results. It should include just a couple of sentences (maximum 255 characters).
When you’re satisfied with your description, click Create Page.
Step 2. Add pictures
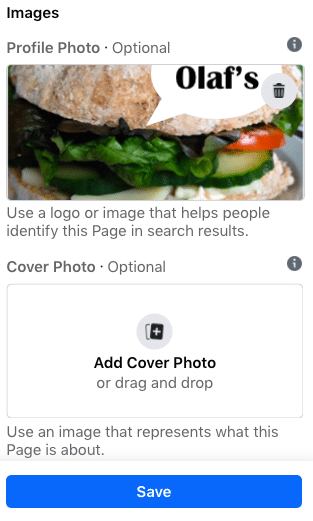
Next on the list is for you to upload a profile and cover images for your Facebook Page. It’s pertinent to create a good visual first impression, so choose wisely here. Ensure the photos you choose to fit your brand and are easily identifiable with your business.
You will upload your profile photo first. This image complements your business name in search results and when you transact and communicate with users. Also, it appears on the top left of your Facebook Page.
If your brand is easily recognized, using your logo is the safest way to go. If you’re a public figure or celebrity, a picture of your face will work. Also, if you’re a local business, use a well-shot image of your signature offering. The pertinent thing is to assist a potential follower or customer to recognize your page immediately.
In the area of the best image size, your profile image size should be 170 x 170 pixels. It will be cropped to a circle when uploaded, so don’t include any critical details in the corners. Once you’ve got a great photo, click on Add Profile Picture.
After that, you will choose your Facebook cover image, the most important image on your Page.
The cover image should capture the motive of your business and communicate your business or brand personality. Facebook recommends you choose an image that’s 1640 x 856 pixels for cover images.
Once you have selected an appropriate image, click Add Cover Photo.
Source: Facebook
After uploading the photos, you can click the buttons in the top right of the preview to toggle between desktop and mobile views. Use these to ensure you’re happy with how your images look in both displays. You can adjust the images in the left column to change their positioning.

When you’re happy with your selections, click on Save.
Step 3. Connect your Facebook business page to WhatsApp (optional)
After you click on Save, you’ll see a pop-up box asking if you want to connect your business page to WhatsApp. Although, this is optional but it will permit you to add a WhatsApp button to your page ok send people to WhatsApp from Facebook ads.

If you want to connect your business page to WhatsApp, click on Send Code. Otherwise, exit the window to continue without connecting WhatsApp. You’ll get one more pop-up box asking if you’re sure of your decision. Since we’re skipping this, for now, click on Leave.
Step 4: Create your username
Your username, also known as your vanity URL, is how you tell people where to find you on Facebook.
Your username can be around 50 characters long, but don’t use extra characters just because you can as you want it to be easy to type and easy to remember. Your business name is a very important.
To create your username, click on Create Username on the Page preview.
Enter the name you want to use as a username. Facebook will allow you know if it’s available. If you get a green popup, you’re good to go. Click on Create Username.
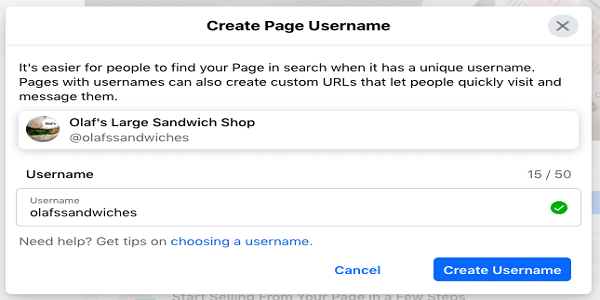
You’ll get a confirmation pop-up. Just click on Done.
Step 5: Add your business details
We know that you might be tempted to leave the details for later, but it’s essential to fill out all of the fields in your Facebook Page’s About section right from the start.
As Facebook is always the very first place a customer goes to get information about you, having it all there is pertinent.
The good news is Facebook makes this very easy to complete. All you have to do is scroll down on your Page view to the section known as Set Your Page Up for Success and expand the item called Provide Info and Preferences.
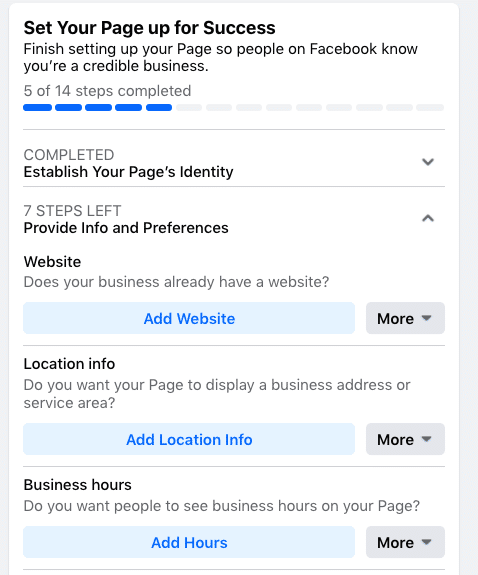
Fill in the appropriate details in the section, starting with your website.
If your business is open to the public during specific hours, ensure to enter those here. This information shows in search results.
Don’t forget to conclude the Add an action button section.
Facebook’s built-in call-to-action(CTA) button makes it very simple to provide the consumer with what they’re looking for and it permits them to engage with your business in real-time.
The right CTA button will motivate visitors to learn more about your business, download your app, shop, or book an appointment.
To add your CTA, click the blue box that expresses Add Button, then select which kind of button you want.
If you don’t want to conclude all of these steps now, you can access them later. In the Manage Page section on the left, scroll down to Edit Page Info.
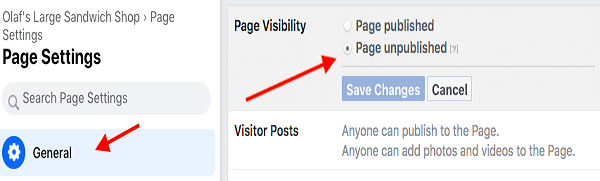
If you decided to take your Facebook Business Page offline anytime while you work on the details, you can select to unpublish your page. From the Manage Page menu, click Settings, then proceed to General. Click on Page Visibility and change the status to Page unpublished.
Follow the same steps to republish your page anytime you’re ready.
Step 6. Create your first post on the Facebook page
Before inviting people to like the Facebook Page for your business, it is important to post valuable content. You can create your posts, or share related content from thought leaders in your industry.
You could as well create a specific type of post, like an offer or an event—just click on one of the options in the Create box at the top of your page.
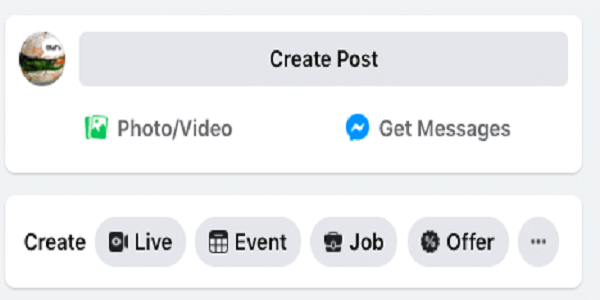
Ensure that whatever you post gives value to your visitors when they arrive at your Facebook Business Page so that they’ll be motivated to visit your page frequently.
Step 7. Invite an audience
After all these stages, your Facebook Business Page now shows a robust online presence that will convince potential customers and fans to feel comfortable interacting with you.
Also, you need to get some followers!
Start the process by inviting your existing Facebook friends to like your Page. To do this, just scroll down to the bottom of the Set Your Page up for Success box and enlarge the section called Introduce Your Page.

Click on the blue Invite Friends button to pop up a list of your personal Facebook friends. Select the friends you want to invite, then click on Send Invites.
Use your other media, like your website and Twitter, to boost your new page. Include “follow us” logos on your promotional materials and email signature. If you’re comfortable with the process, you can tell your customers to review you on Facebook, too.
Conclusion
We believe that this article will assist you in creating your Facebook page. Thank you!
Frequently Asked Question(s)
Is creating a Facebook business page free?
Setting up a Page is simple and free, and it looks great on both desktop and mobile, so you can meet customers on any device.
Does a Facebook business page have to be linked to a personal account?
Facebook requires every business page to be linked to a personal Facebook profile, but all the information—posts, comments, photos, updates, etc. —are separate. The information on your personal profile will not appear on your business page and vice versa, unless you manually share them between pages.
Reference(s)
- https://blog.hootsuite.com/ – How to Create a Facebook Business Page in 7 Easy Steps